
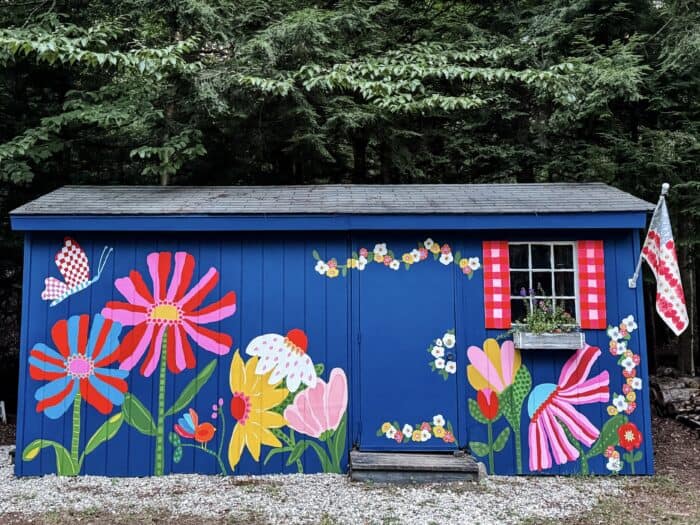
From Brown Box to Blooming Beauty: My Shed Mural Makeover
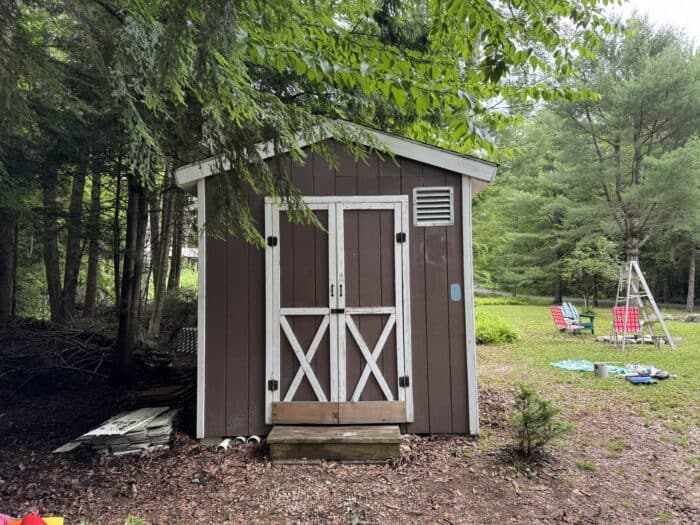
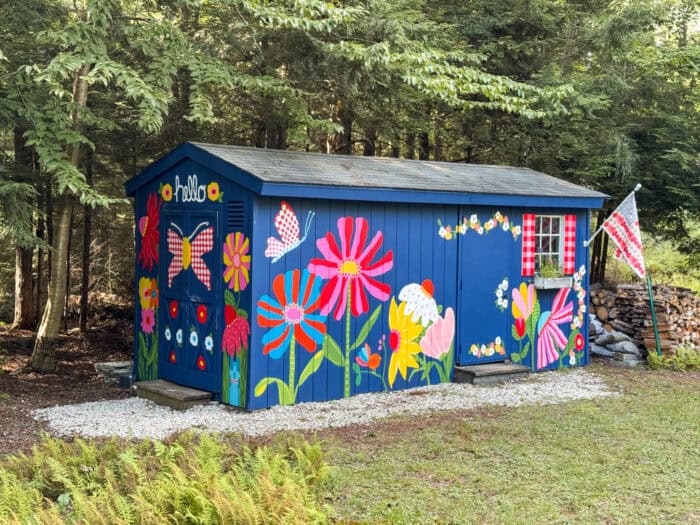
If you’ve been following my cabin adventures, you know this little brown shed has been begging for joy. It was finally time to add a shed mural makeover to my to-do list, and this summer I finally gave it a full-on outside makeover—color, pattern, and a garden of oversized florals that make me smile every time I walk by.

A Coach, a Plan, and the Right Paints
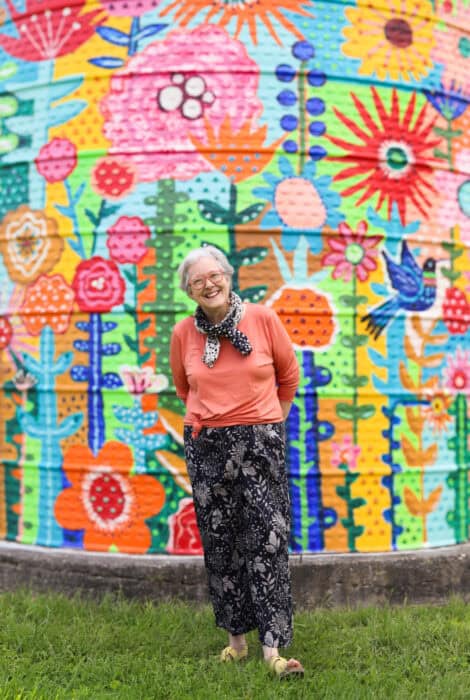
Artist and friend Lori Siebert coached me through the process. If you don’t know Lori, she’s an amzing artist who licenses her art for all kinds of products, teaches others in online classes, and even hosts art retreats in other countries. You can check her out here. We’ve been friends for a while!
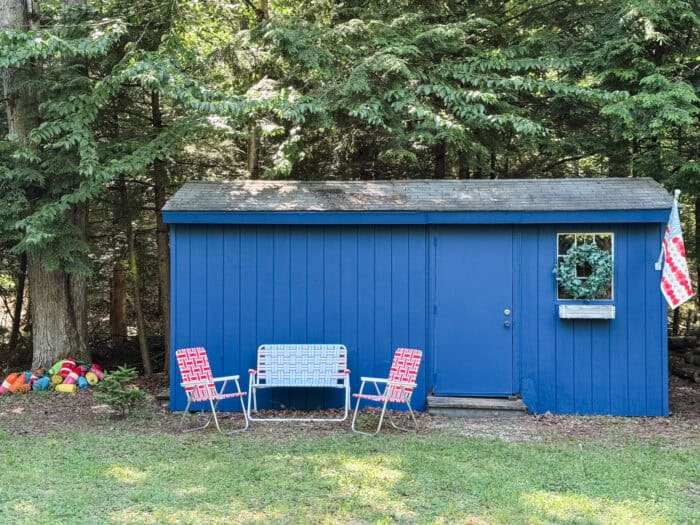
She sketched layout ideas for the shed mural makeover (tap here to see that blog), helped me think about scale, and recommended Nova Paints for the mural colors. For the base, we covered the entire shed in Sherwin-Williams Salty Dog, a deep blue that matched what we painted my cabin last year (tap here to see).
How I Started (and Kept Going)
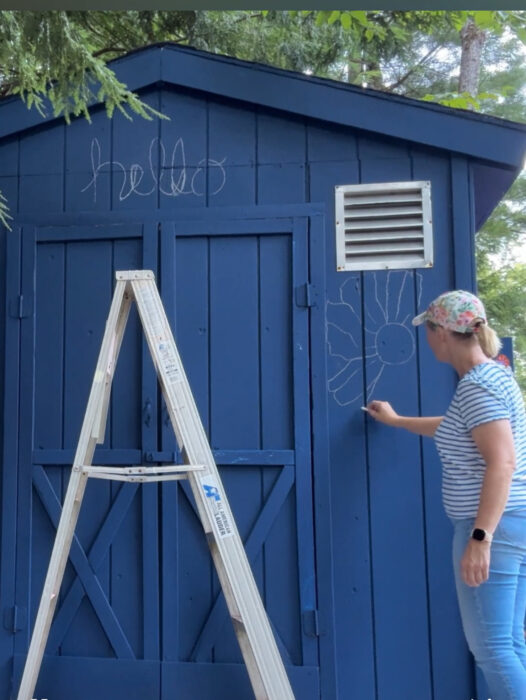
I was intimidated at first—blank walls are scary! I did try using a projector at night to sketch, but I just couldn’t see the outline well enough. Lori drew a grid for me on the plan, so I used that loosely as a guide, making little chalk mark grids on the shed so I would know where to place the flowers.
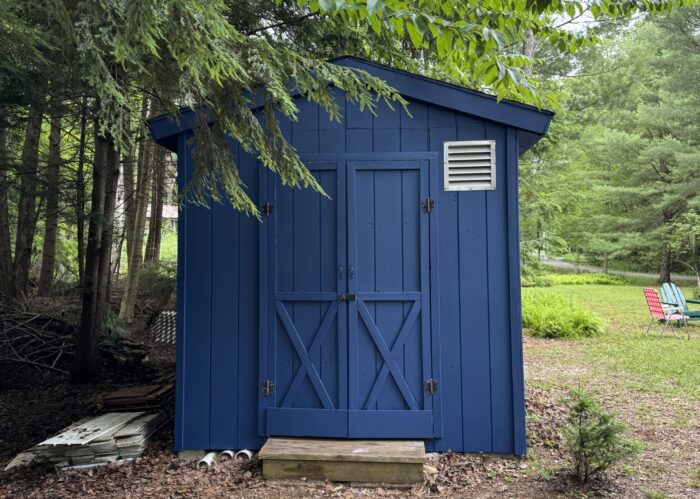
I grabbed a stick of chalk and began lightly sketching. I erased a lot. Getting the scale right took time: tall stems to lead the eye up, large blooms to anchor the corners, and smaller daisies to “stitch” sections together. If I painted a shape I didn’t love, I simply rolled Salty Dog back over it and tried again. Chalk and touch-up paint = freedom.
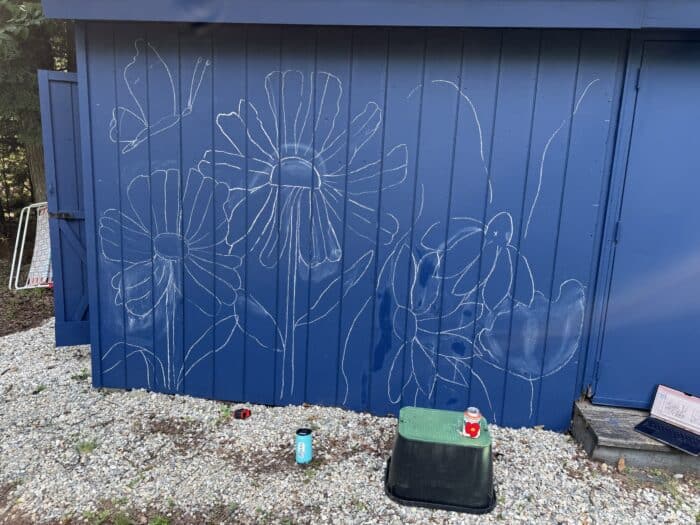
Because the base was such a deep navy, the mural paints needed multiple coats to fully show their vibrancy. Each flower layer became brighter and more dimensional after I went back over it two or even three times. I mixed a lot of colors to get the right shade…that was an experiment in itself! It’s trial and error.
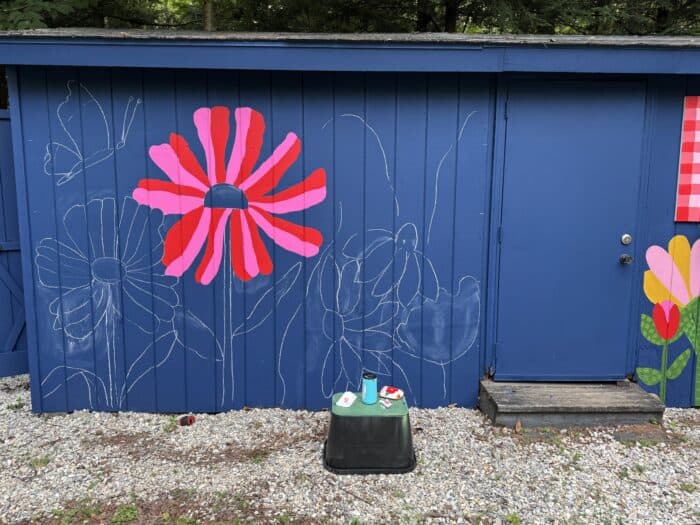
The extra effort was worth it—the colors now look like they’re glowing against the dark background. If I painted a flower a color that I ended up not liking, then I just painted over it…I did that a lot!
Off the Sketch and Into My Own Style
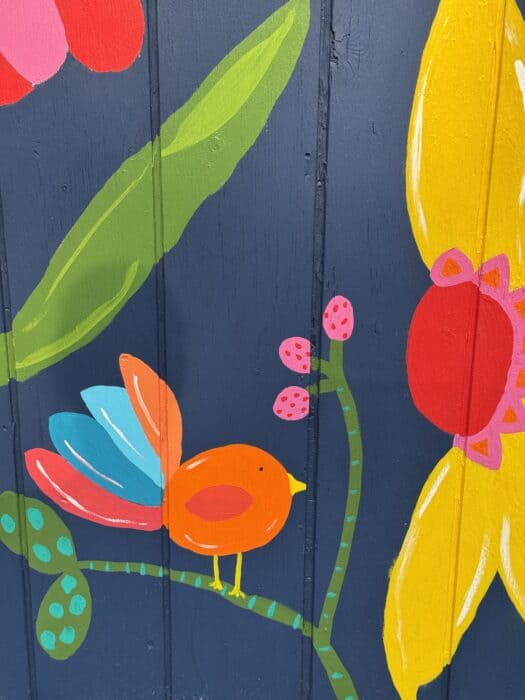
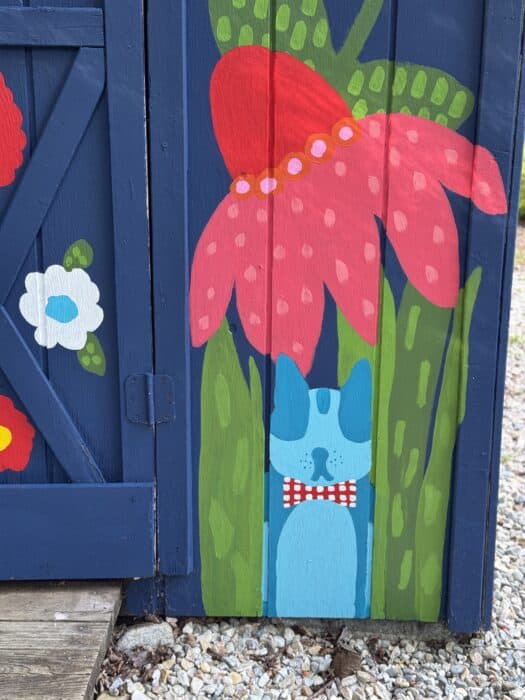
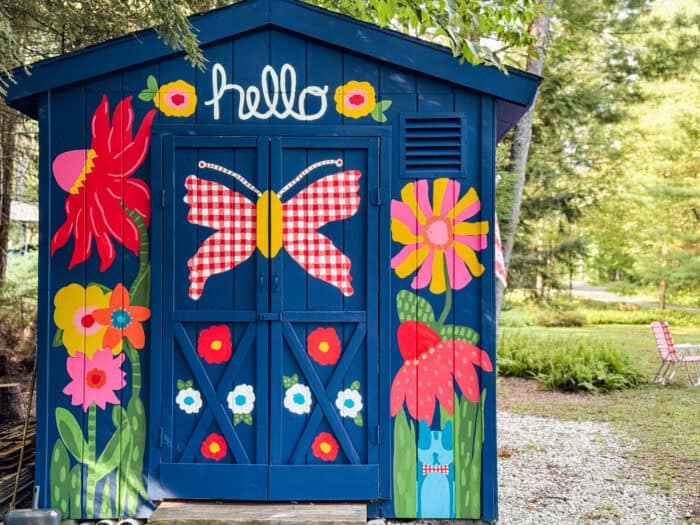
As the shapes took form, I got braver. I riffed off Lori’s plan and added my own flower designs along with a few cheerful friends—a little bird perched on a stem and Maui (in disguise!) tucked behind tall grass on the side. This is where the magic happens: when a plan meets play.
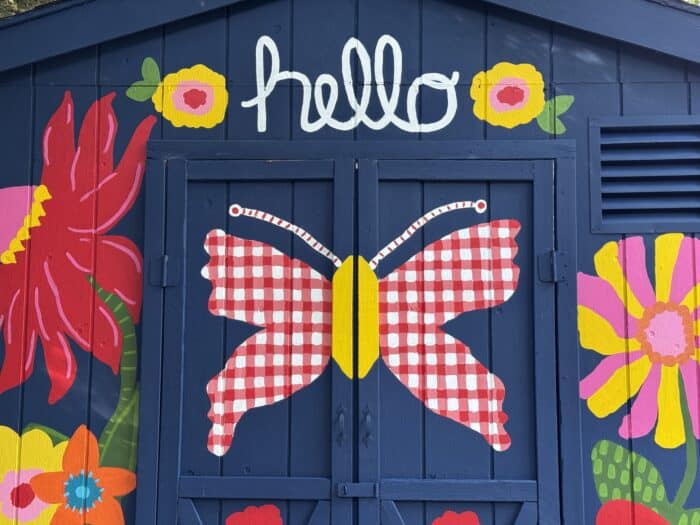
Door, Trim & Gingham Details
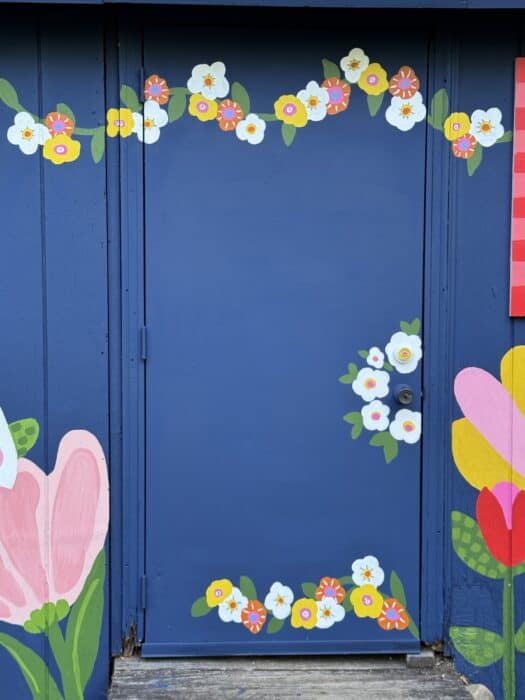
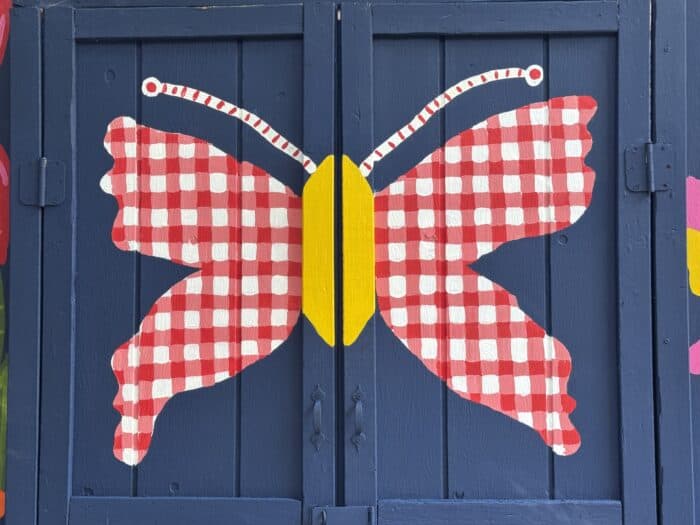
You might remember my gingham shutters from a recent post—those playful checks tie in beautifully with the flowers on the door. Pattern on pattern is my love language, and the red-and-white window treatment makes the whole shed feel like a storybook.
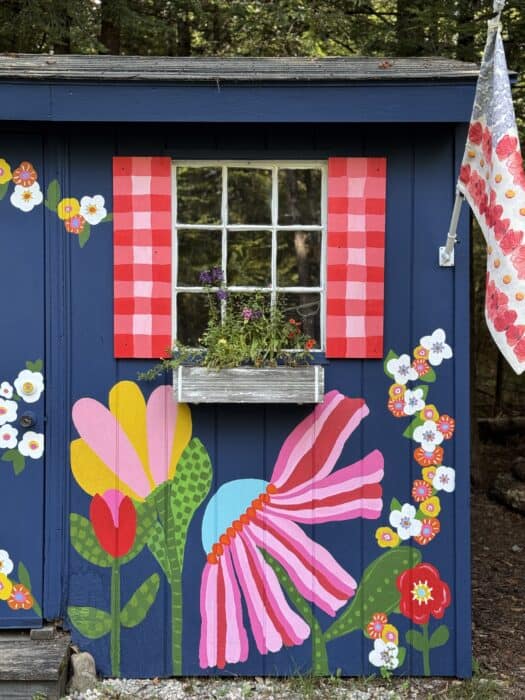
Having the gingham also vetoed the striped door (part of the original plan), so inventing a new idea was necessary. The eye needed a place to rest, so the flower vine allowed for that.
Finishing the Short Side
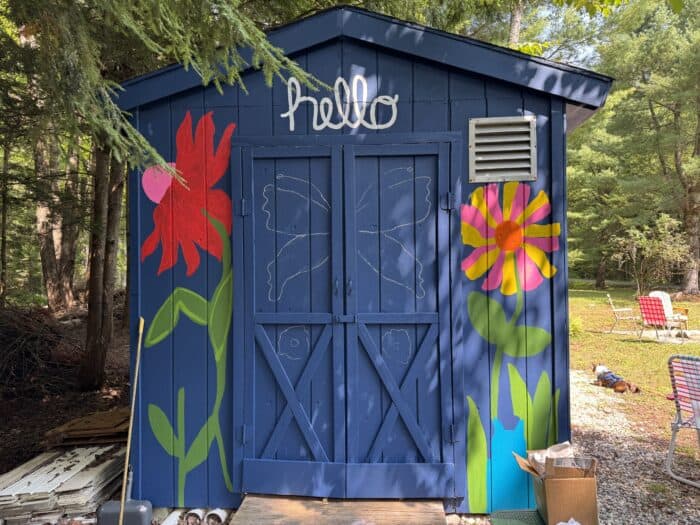
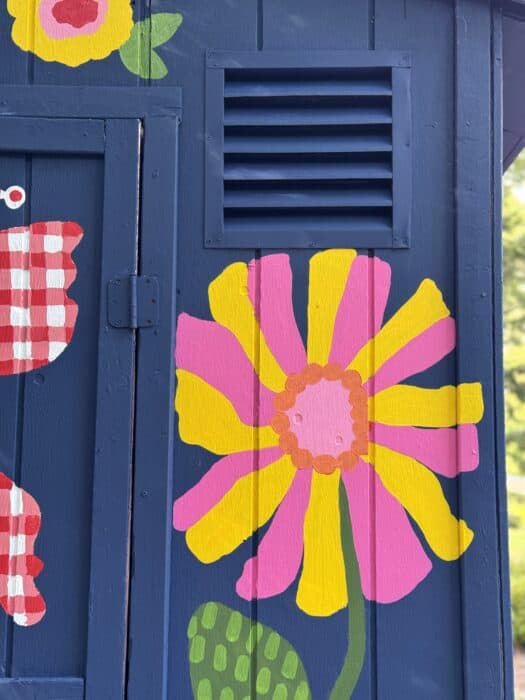
I finally finished the short side this past week. I carried over my gingham theme with the butterfly.
One of you suggested I paint the vent away, so I did that and it’s so much better!
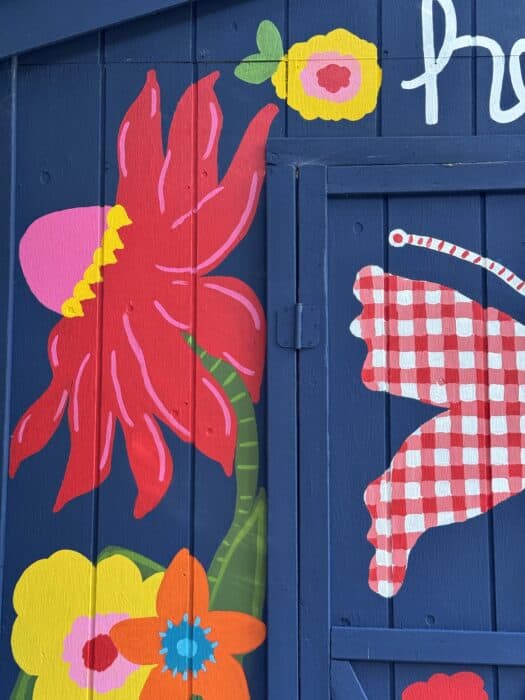
I added a few flowers around the hello.
If you spot Maui hiding in the tall grass, you’re officially part of the Whimsy club. 😉
The Shed Mural Makeover Reveal
The response of my shed mural makeover from neighbors has been pure delight. Neighbors stop mid-walk to chat, and even the FedEx driver has shouted compliments from the road. Color has a way of inviting connection.
Materials & Colors I Used
-
Base: Sherwin-Williams Salty Dog (exterior) – applied two coats for full coverage
-
Mural: Nova Paints in assorted brights (pinks, greens, yellows, reds, whites, greens)
-
Tools: Chalk for sketching, all sizes of art brushes, smaller brushes for details, small plastic cups for mixing paints
-
Process: Paint base → chalk sketch → block in big shapes → layer petals/leaves → add detail lines/dots → cover over with base color where needed
Tips If You Want to Try a Shed Mural Makeover
-
Choose a base to make your palette sing.
-
Sketch with chalk and step back often—scale is everything.
-
Edit with paint. Don’t love a shape? Paint it out and try again. (I did this a lot)
-
Repeat motifs (daisies, dots, leaves) to unify the whole wall.
-
Hide an Easter egg. A tiny creature or monogram adds personality.
Stepping Out of My Comfort Zone
This mural was my very first, and I’ll be honest—it took me weeks to get it where I wanted it. There were moments of hesitation, plenty of erasing, and more than a few “do-overs.” But every layer taught me something new, and the joy of seeing it come to life made all the effort worth it.
If you’ve ever thought, “I could never do something like that,” let me assure you—you absolutely can. Start small, sketch it out, and remember that “mistakes” aren’t the end of the world. You can always paint right over them and try again.
Stepping out of your comfort zone is where the magic happens. For me, that meant turning a plain brown shed into a colorful, flower-filled mural that makes me smile every single day. Maybe for you it’s a shed, a wall, a piece of furniture—or something else entirely.
So grab a brush, take a deep breath, and give yourself permission to play. You never know what beauty is waiting to bloom when you just begin. 🌸🎨✨
I also updated the inside of the shed in pink. Hop over to this link to see that transformation.

Check out my online courses to spark your creativity and upgrade your joy, starting today!


10 Best Statement-Making Fabrics from Spoonflower