
How to Zhuzh Up Filing Cabinets for Stylish Storage
For me, after Christmas is the perfect time for some organization, and this year is no different. Just this weekend I worked on a storage makeover for my studio using an old filing cabinet. Filing cabinets are the perfect storage for many reasons. First, there’s plenty of them for sale on Craigslist, Marketplace, and at yard sales. Second, they are cheap—I never pay more than $25 for one. And third, they come in all sizes, so no matter how much storage space I need, a filing cabinet can provide it.
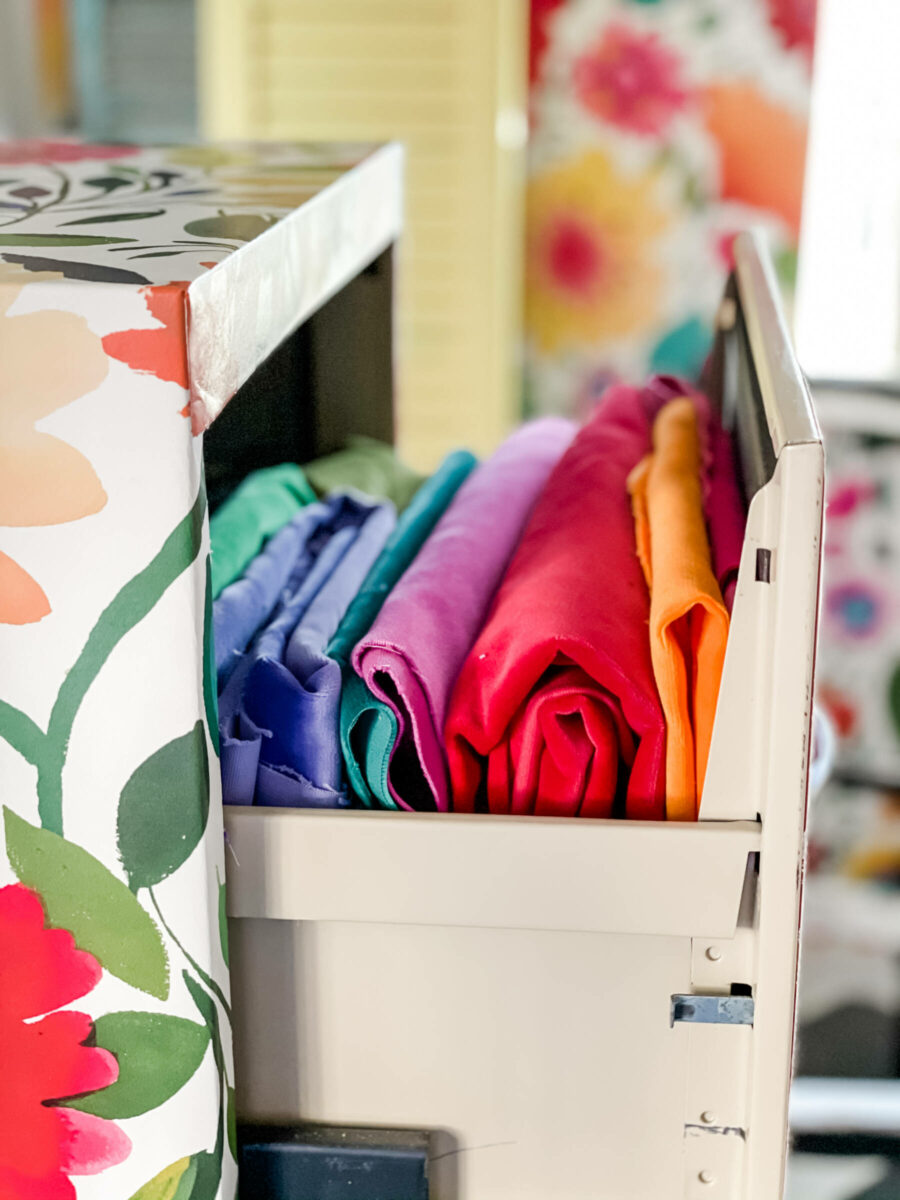
Fabric scraps in my studio are constantly piling up, so over the past few years I’ve used filing cabinets to neatly tuck them away. (The same for my quarts of paint, by the way!)
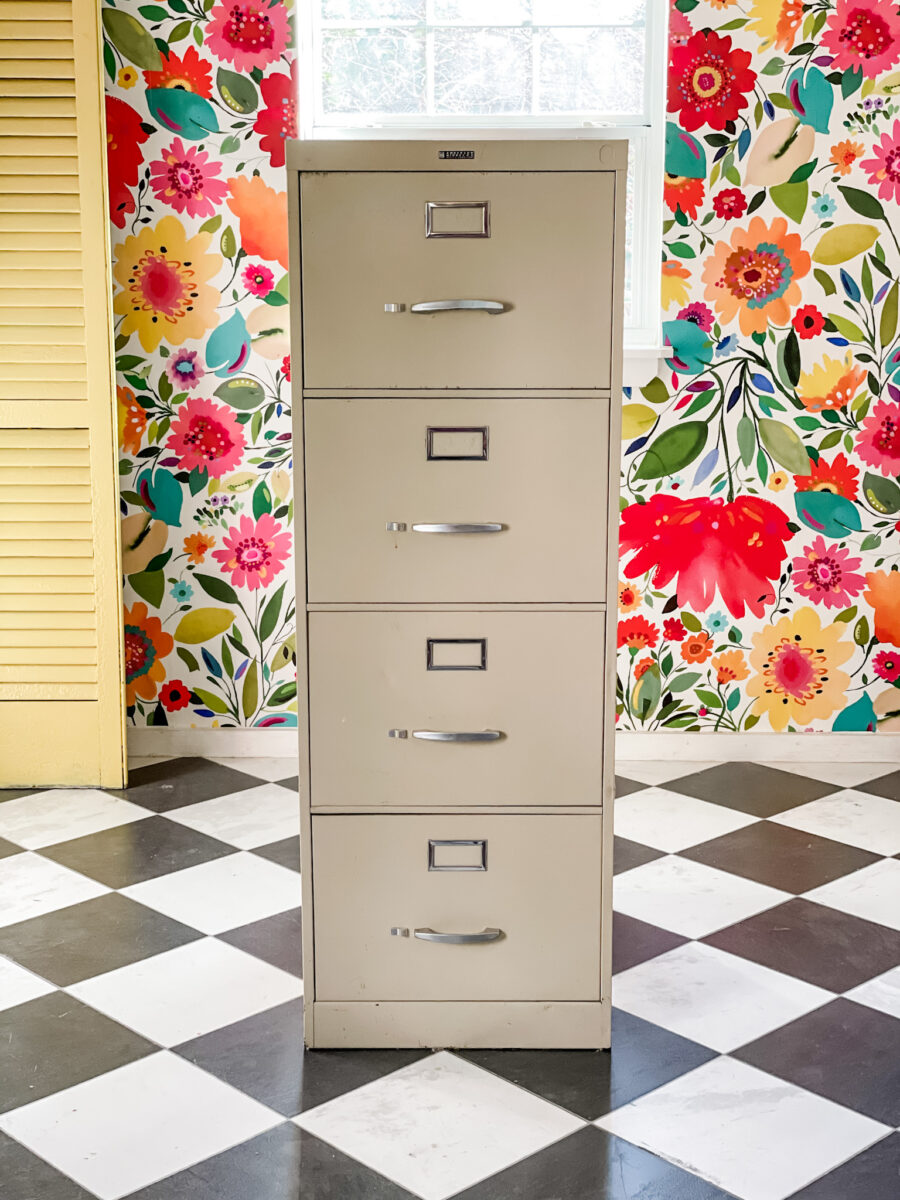
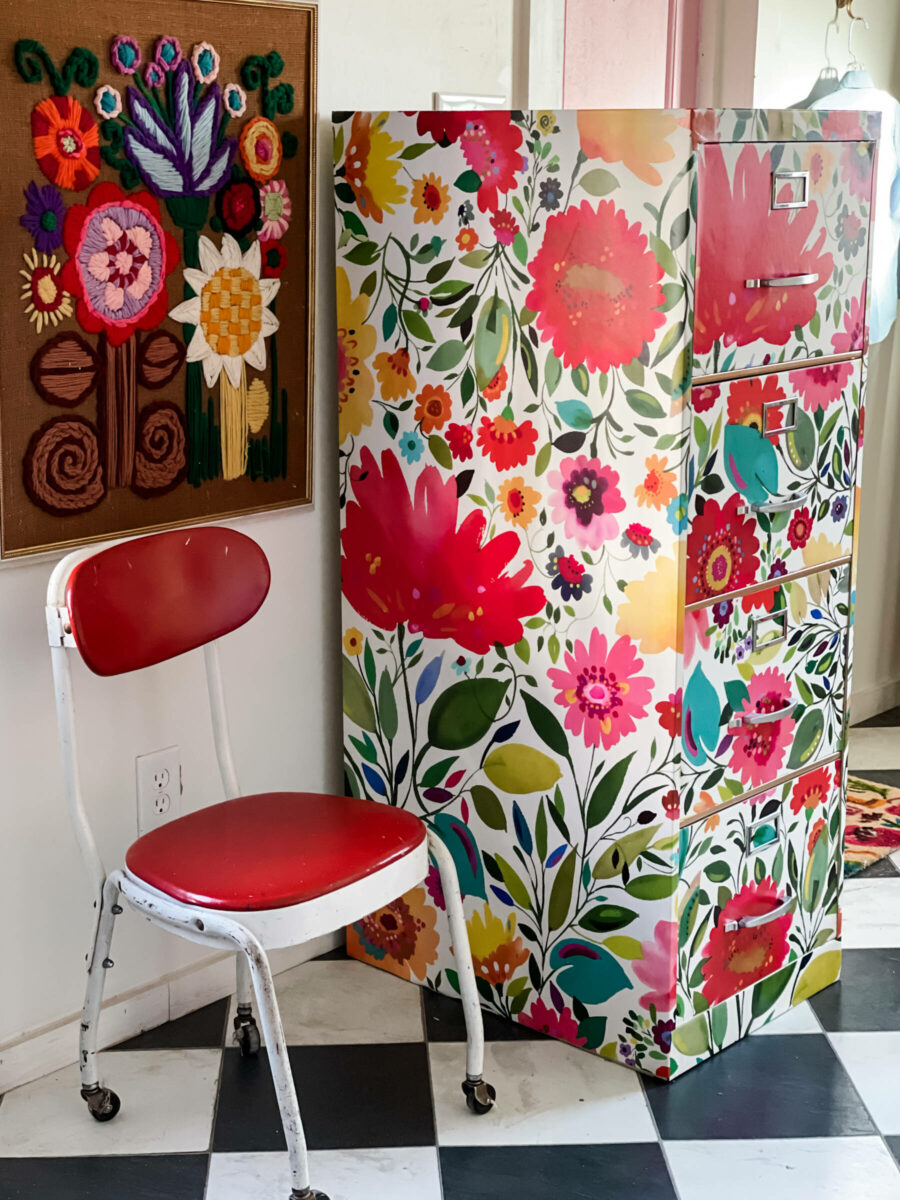
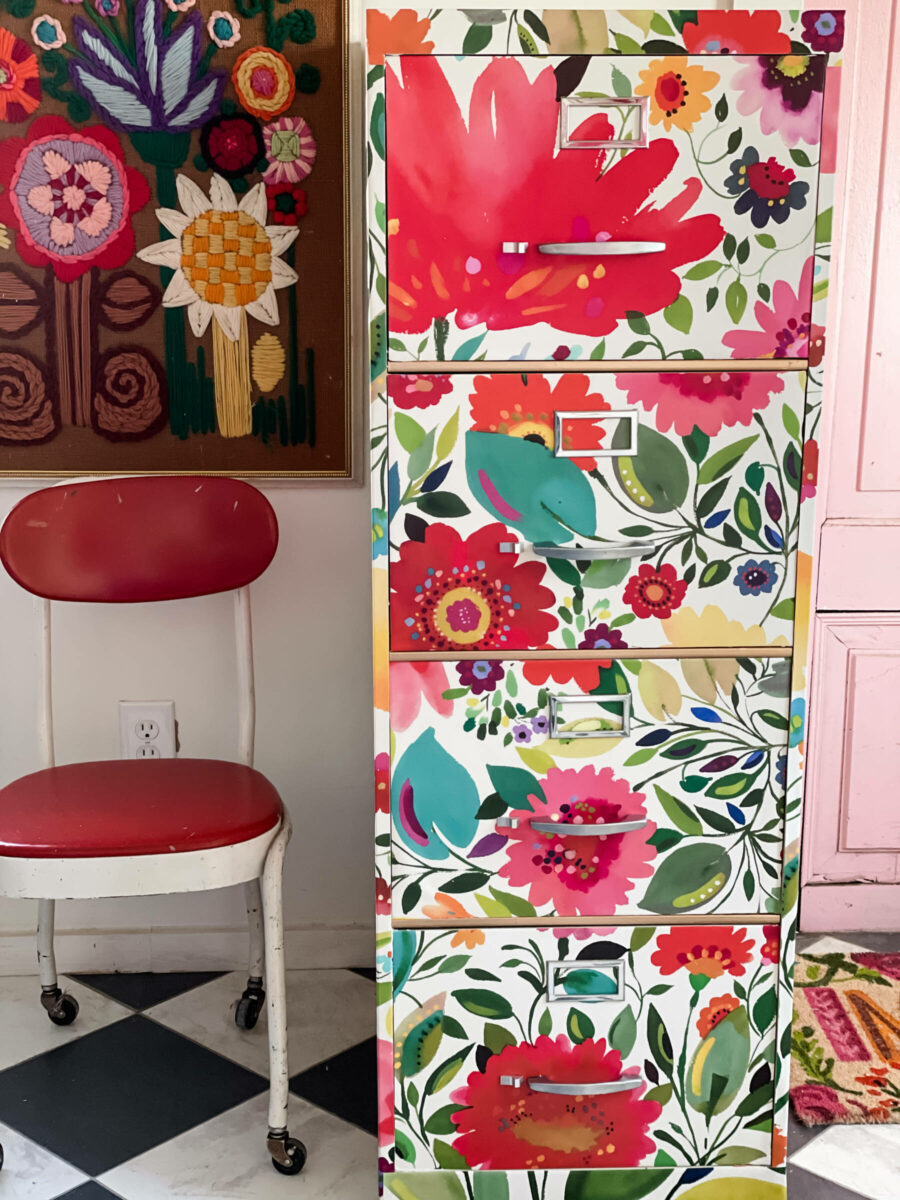
I found this filing cabinet a couple of months ago on Marketplace for $20. It’s large and has tons of space. The only problem with filing cabinets is that they are not attractive…but that, my friends, we can fix!

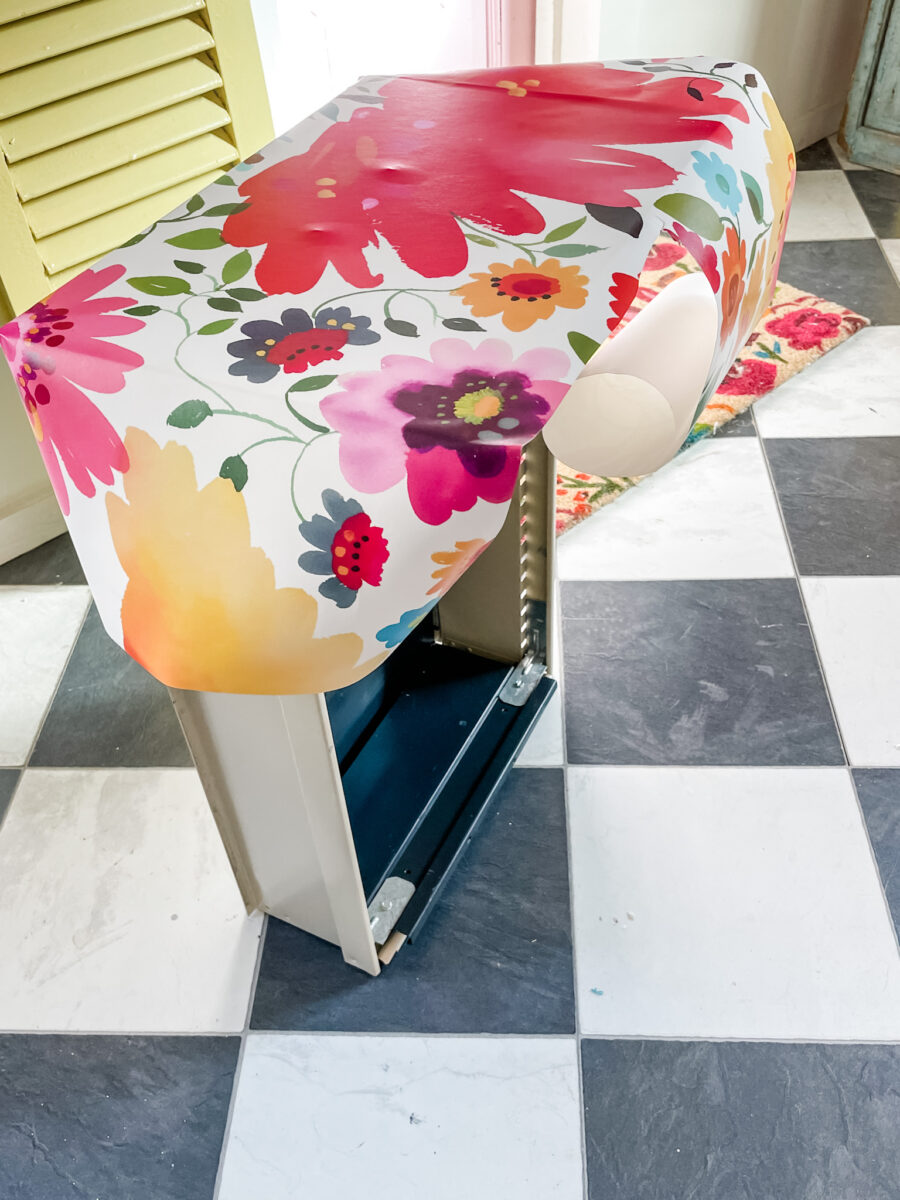
This past year I’ve done many wallpaper projects, so wallpaper scraps are abundant around here. And I had just enough of this Kim Parker wallpaper from my studio project to use.
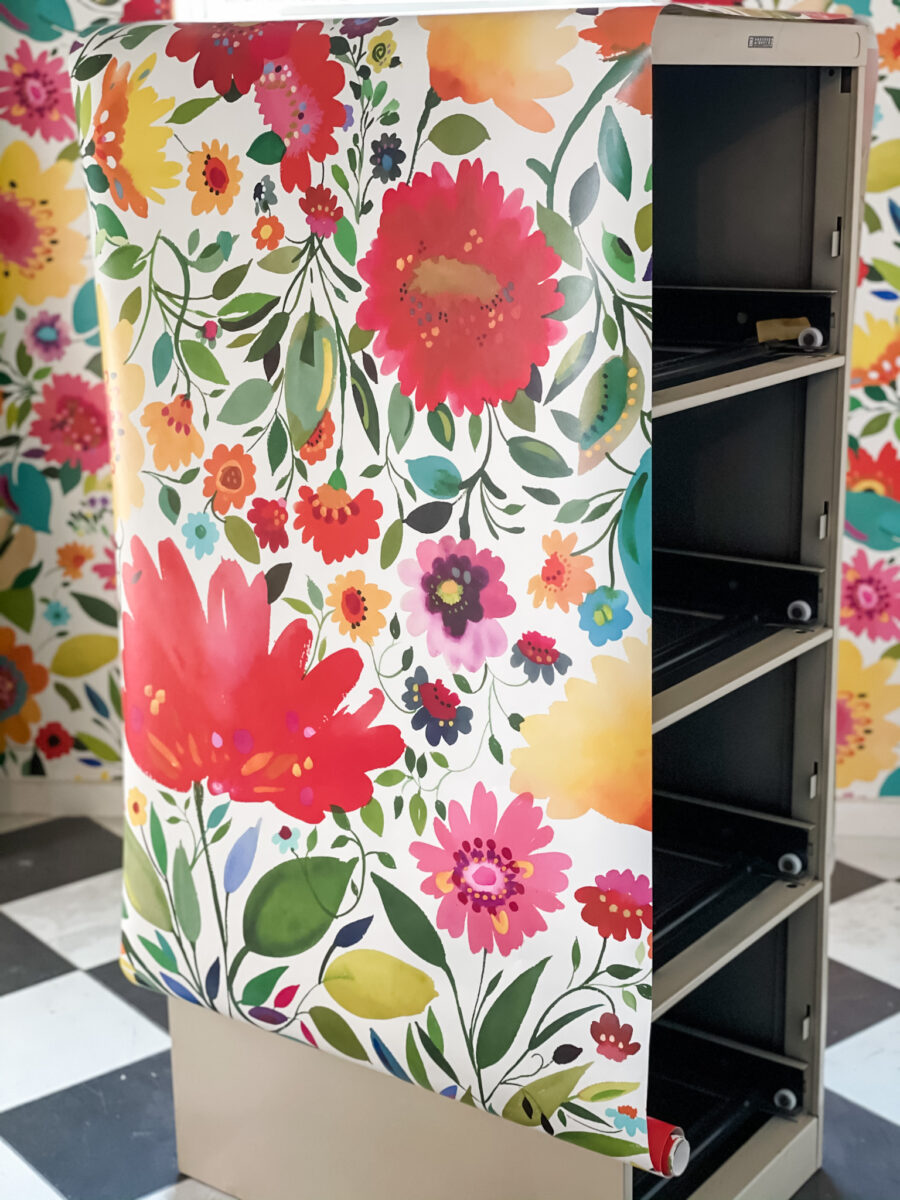
Some wallpaper, like this one, is not pre-pasted, so you have to apply wallpaper adhesive with a brush. It’s simple to do and better if you apply it liberally—more paste is better than not enough! If it were pre-pasted, I would have just run it under water in my utility sink and applied it directly to the metal cabinet.
When applying the wallpaper, I use a rubber scraper meant for cleaning dishes to gently get out any bubbles, working from one direction to the other in rows. You want the wallpaper piece to be a little larger so you can cut the excess away once it dries.
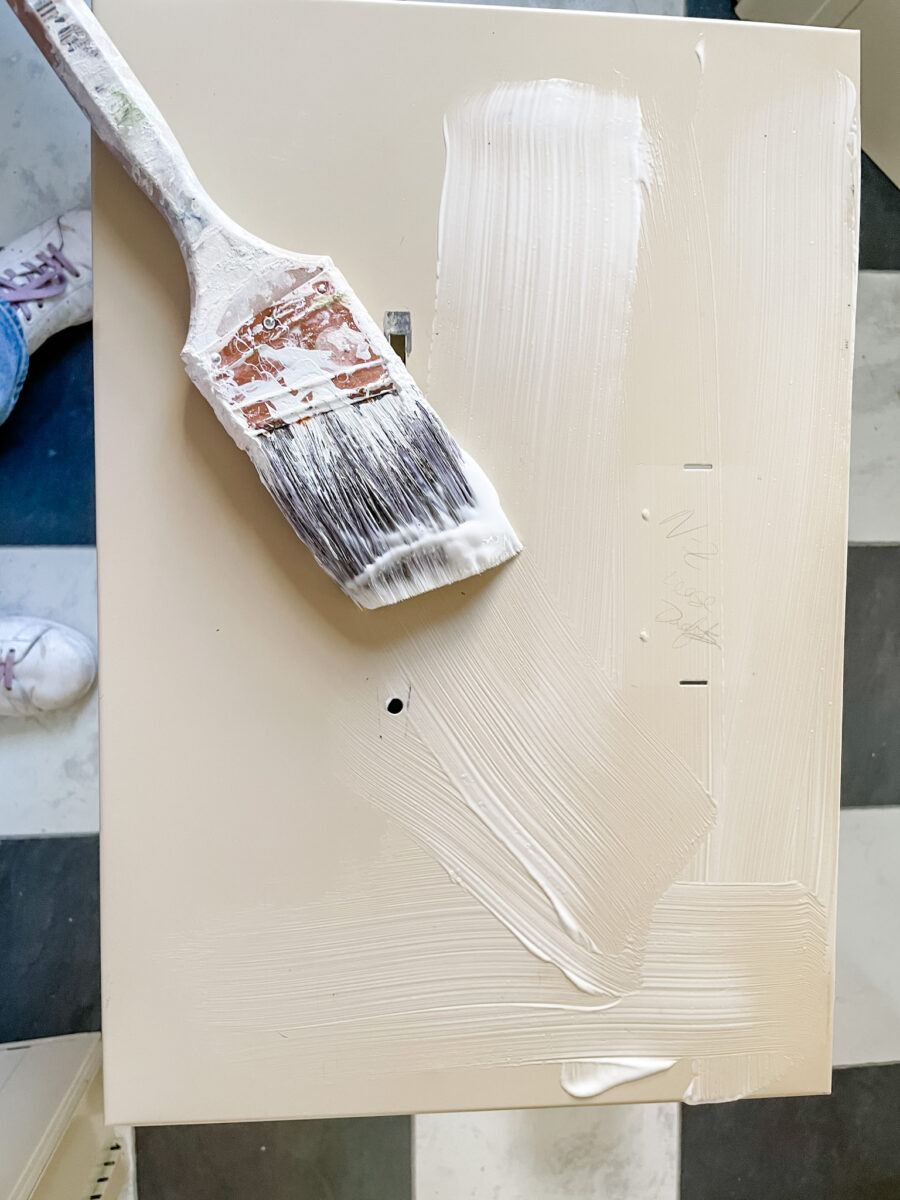
When working on the drawer, remove the hardware and put it back on once the paper is dry and trimmed. Be sure to take pictures of what it looks like on the inside before you remove the screws and hardware. That way you’ll remember how to reassemble the working pieces.
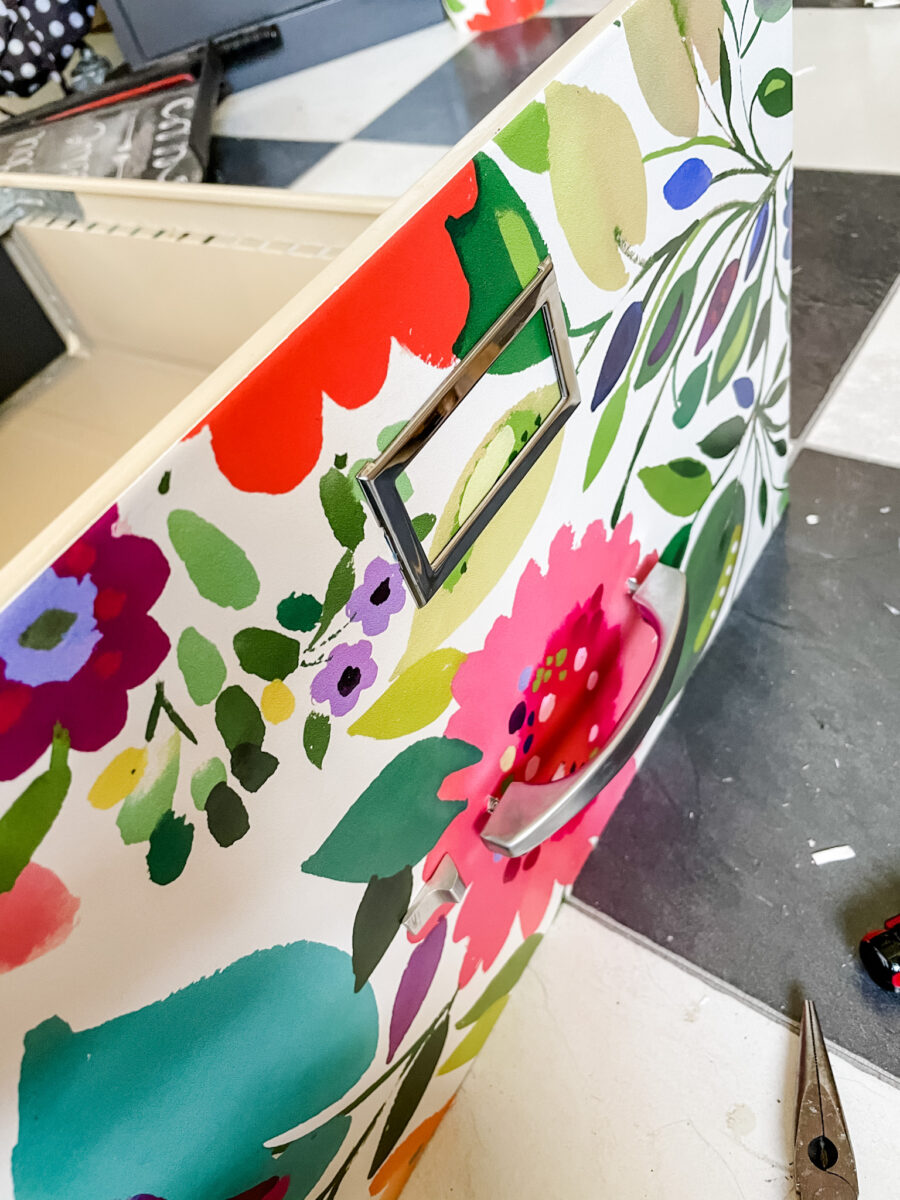
Don’t try to trim it before drying…it’s easier to get a clean edge once the paper is dry. I use a heavy duty utility knife with a new razor to get the best trims. I always wait a day to do the trimming.
I do get many questions asking about peel-and-stick wallpaper, but I’ve never used it. I’ve found regular wallpaper to be easy to manipulate. If you put it on wrong, you can take it right off and move it around.
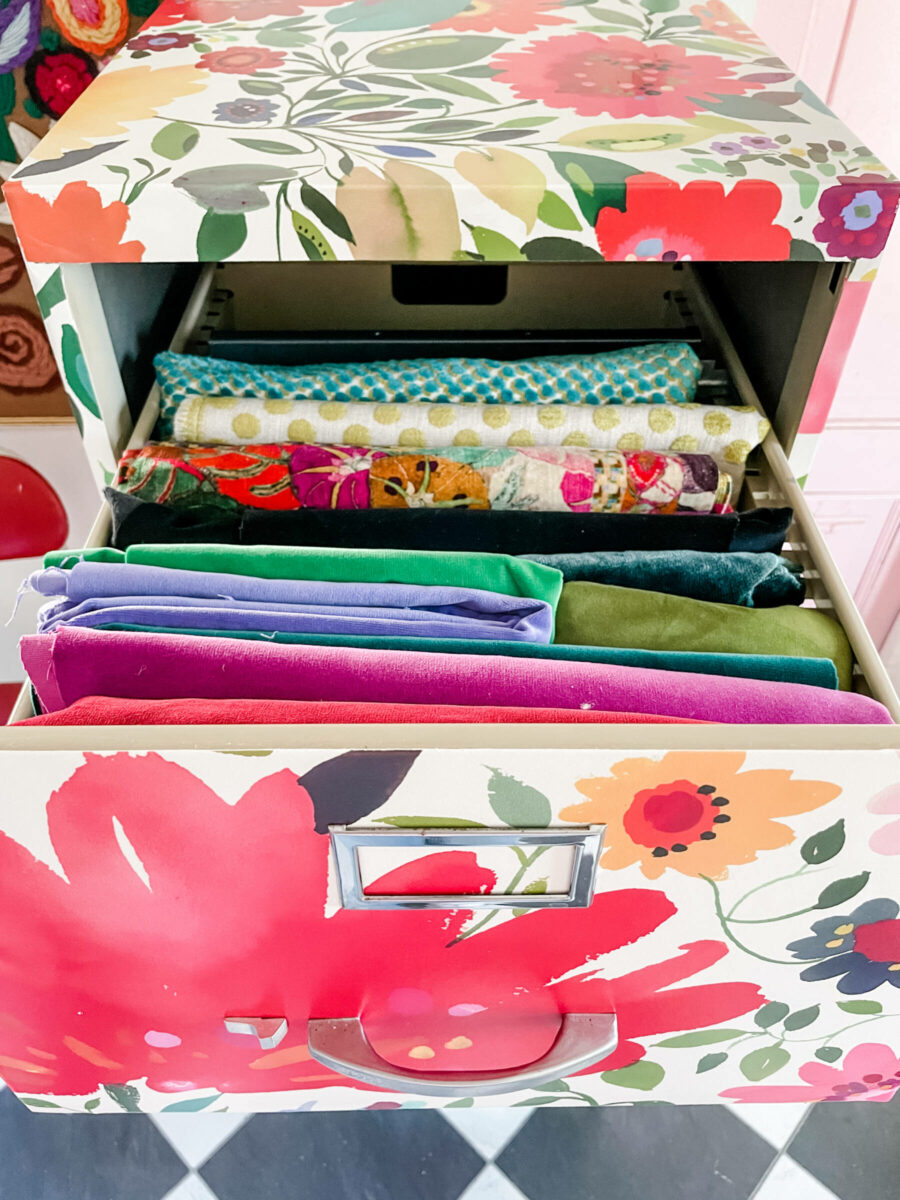
Think about all the things you can store inside a filing cabinet…art supplies, paint, paper, extra dishes, linens, holiday decor, and junk!!! And if you make it stylish using wallpaper, decoupage, or spray paint, no one will ever have to see all the treasures you hide inside it.
No matter where I put this filing cabinet in my studio, it’s going to add to the fun of the space instead of being an eyesore. And it didn’t take a lot of time to do…only about 3 hours total over 2 days.
So, go find your dream filing cabinet and zhush it up! It doesn’t cost a lot of money, and I promise, you’ll be so glad you did!

Check out my online courses to spark your creativity and upgrade your joy, starting today!


10 Best Statement-Making Fabrics from Spoonflower