How to Stencil Fireplace Tile (Without Ripping Out a Single One!)
A fireplace tile stencil makeover might be the most satisfying DIY project I’ve ever tackled — and I’ve tackled a lot of chairs. There it was — a perfectly fine fireplace with perfectly fine marble tile. Inoffensive. Quiet. Beige in spirit, if not in color. And every single time I walked past it, I thought: this fireplace has absolutely nothing to say.
Well. We fixed that.
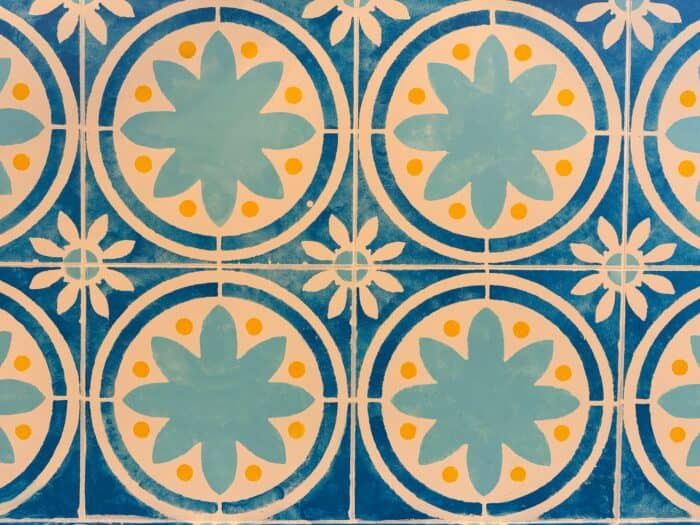
I recently completed this fireplace tile stencil makeover using the Cutting Edge Stencils Primavera Tile Large stencil, and the result is bold, joyful, and bursting with personality — exactly the way I like it. No demo. No contractor. No clouds of tile dust. Just paint, a stencil, and a willingness to go for it. The makeover was so good it landed in the pages of Cottages & Bungalows Magazine — but today you’re getting the full behind-the-scenes right here.
Before: Fine. Just… Fine.
The original marble tile surround was the design equivalent of a shrug emoji. Classic, yes. Timeless, sure. But it had zero personality, zero color, and zero joy. My home is full of bold pattern, happy chairs, and color that makes me smile every morning — and this fireplace was just sitting there being beige about everything.
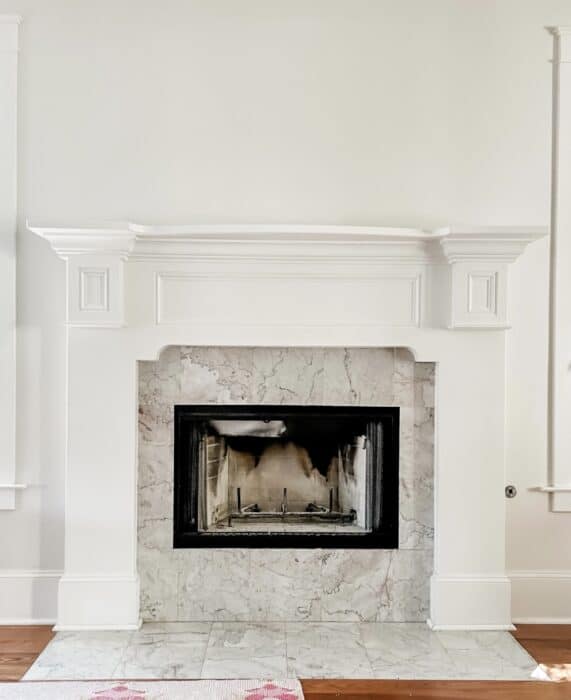
I knew I didn’t want to rip it out. I just wanted to give it a personality transplant.
Enter: fireplace tile stenciling.
What You’ll Need
Here’s your shopping list before we dive in:
- Cutting Edge Stencils Primavera Tile Large (TL025_LG) — get the size you need for your tiles
- Stix primer
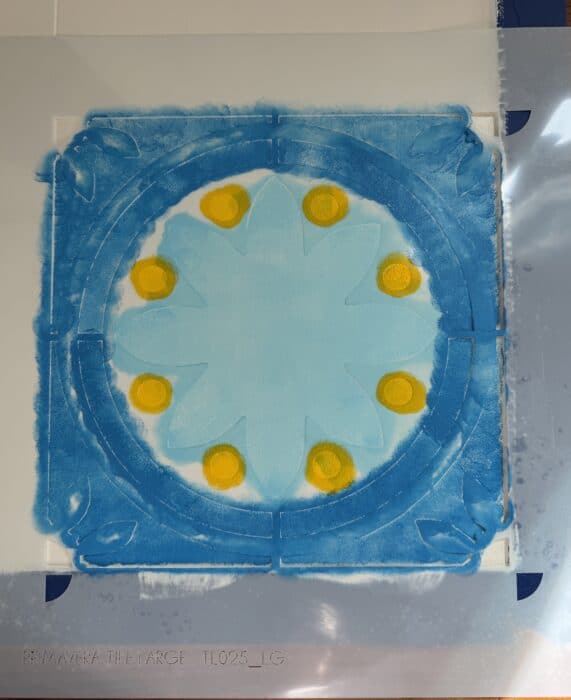
- Acrylic paints in your chosen colors (I used shades of cerulean blue, sky blue, and cadmium yellow)
- Aleene’s Repositionable Tacky Spray
- Small foam brush (trust me on this one — more on why below!)
- Mini foam roller (for reference, but the brush wins)
- Paper towels
- Painter’s tape
- Clear protective topcoat

Step 1: Clean the Tile Thoroughly
Before anything touches that tile, it has to be squeaky clean. I wiped down every inch of the marble surround to remove dust, grease, and any debris. Any grime left behind will prevent the primer from bonding properly, so don’t skip this step. A clean surface is everything.
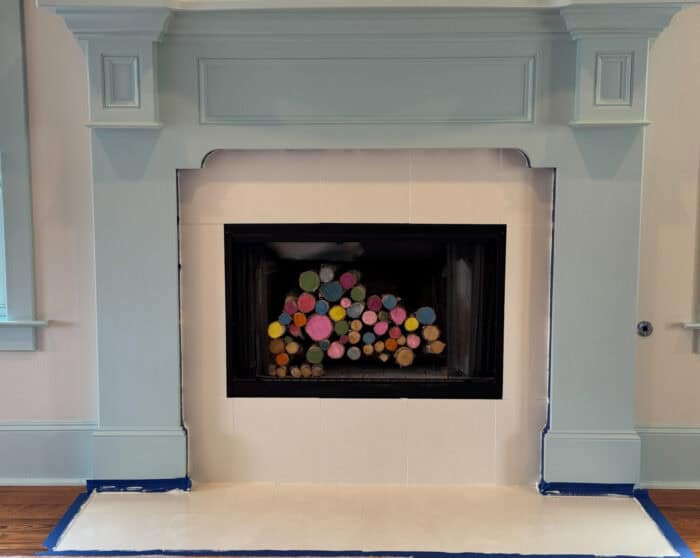
Step 2: Prime with Stix
This is the secret weapon of the whole project: Stix. This primer is specifically formulated to bond to slick, non-porous surfaces — exactly what tile is. I applied two full coats, letting each one dry completely before moving on.
The result? A beautifully matte, paint-ready surface that looked almost like a fresh canvas. I could already see the transformation beginning.
Step 3: Tape Off the Edges
Before I placed a single stencil, I taped off the edges of the tile surround with painter’s tape. This gave me a clean boundary to work within and protected the mantle and fireplace insert from any rogue paint. A little prep here saves a lot of touch-ups later.
Step 4: Plan Your Stencil Placement (Start on the Floor!)
Here’s a tip I learned the smart way: start with the hearth tiles on the floor, not the vertical surround. The floor tiles are the most visible and easiest to work on — they lay flat, they don’t shift, and practicing on them gives you confidence before you move to the walls.
I mapped out where my full tiles would land versus the partial edge tiles so I could plan my sequence before ever picking up a brush.
Step 5: Apply Tacky Spray to the Back of the Stencil
I spritzed Aleene’s Repositionable Tacky Spray on the back of the stencil just one time — and that’s all I needed for the entire project. You don’t have to re-spray after every single tile. The adhesive stays tacky enough to keep the stencil flat against the surface without it sliding around or letting paint bleed underneath.
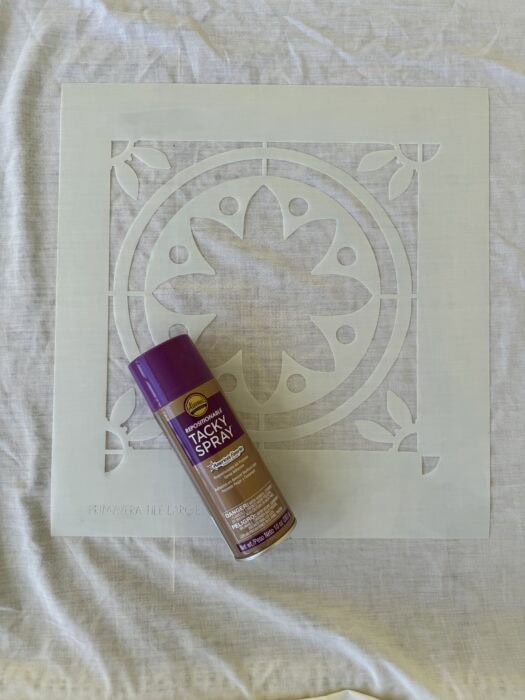
This step is non-negotiable if you want crisp, clean edges.
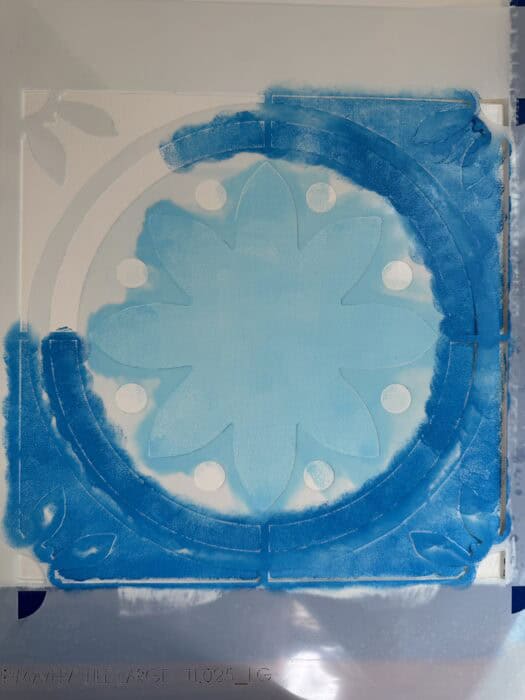
Step 6: Dab — Don’t Roll — Your Paint
Okay, real talk: I thought I’d be using a mini foam roller for this whole project. I was wrong.
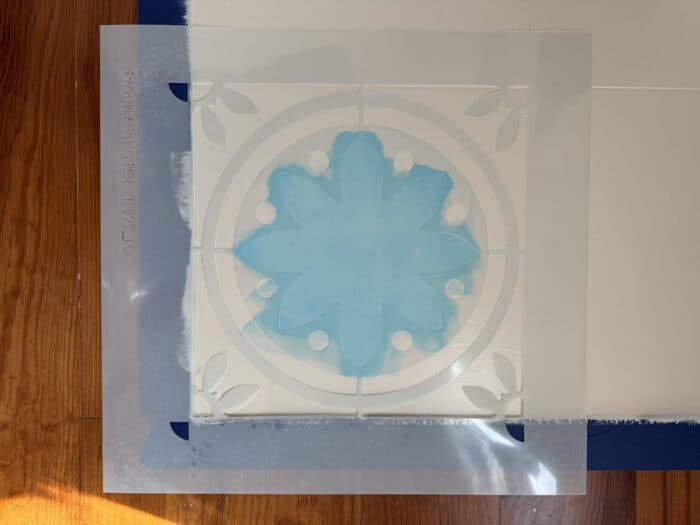
For a cut-out stencil with detailed motifs like the Primavera design, a small foam brush is the right tool. The dabbing motion gives you so much more control.
Here’s my technique:
- Load your foam brush lightly with paint
- Dab off the excess on a paper towel first — this is crucial! Too much paint = bleed, runs, and smudging
- Then lightly dab the paint into the stencil openings using a straight up-and-down pouncing motion
Thin, even layers are always better than one thick coat. The result is a beautifully textured finish that looks almost hand-painted — because it basically is!
Step 7: Skip Every Other Tile
As I worked my way across the surround, I stenciled every other tile and skipped the ones in between. Why? Because placing a stencil directly on top of wet paint is a recipe for smearing. By skipping alternating tiles, you give the paint time to dry before you come back to fill in the gaps.
It takes a little patience, but the clean result is 100% worth it.
Step 8: Complete All Full Tiles First
I worked my way around the entire fireplace — surround and hearth — completing all the full-sized tiles before tackling anything at the edges. Getting into a rhythm with the full tiles builds your confidence and consistency before you get to the trickier cuts.
Step 9: Cut the Stencil for Half and Edge Tiles
Here’s where having two stencils really pays off. For the partial tiles along the edges of the surround — especially the narrow vertical strips along the sides — I cut one of my stencils down to fit. Some of those pieces were quite small, and I trimmed the stencil to match the exact section I needed to fill.
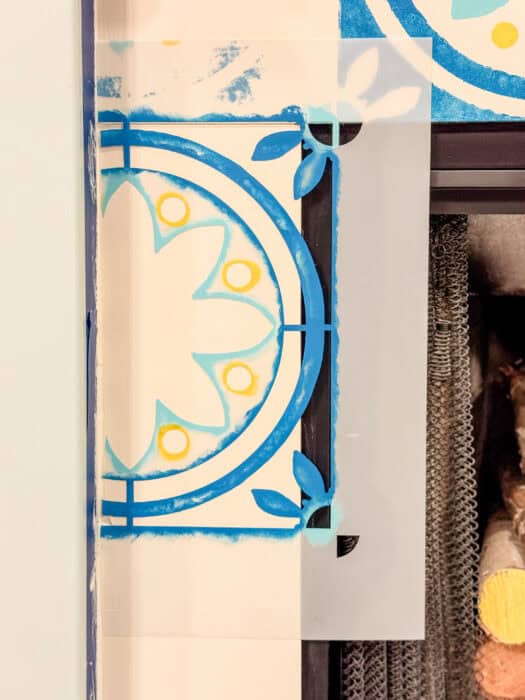
The partial tiles came last, once all the full tiles had been painted and dried. It’s a bit of a puzzle, but the finished look is seamless.
Step 10: Use the Grout Stencil
Cutting Edge Stencils also includes a grout line stencil — and oh my goodness, don’t skip this! Once I laid it over my completed tile pattern, the whole design snapped into focus. Those fine lines between the tiles make it look incredibly realistic and polished. It’s the finishing detail that takes a good result to a jaw-dropping one.
Step 11: Seal with a Clear Coat
Once everything was fully dry and I was happy with the coverage, I applied a clear protective topcoat over the entire stenciled surface. The fireplace surround takes some daily wear and tear — feet, bumps, the occasional cleaning — so sealing it is essential for longevity.
This is the step that takes your DIY from “fun project” to “durable, finished design.”
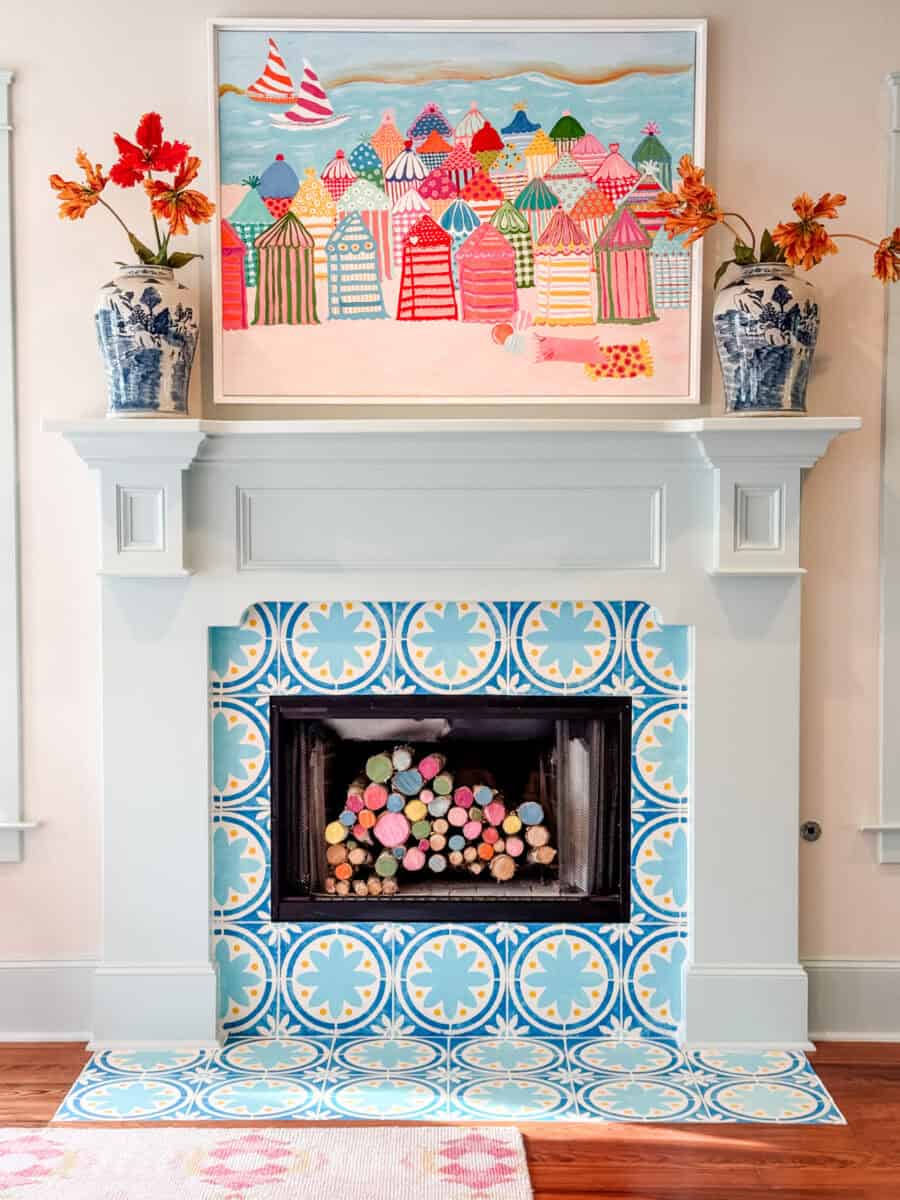
The Result? Now That’s a Fireplace.
Stand back and look at that. This fireplace tile stencil makeover took us from “perfectly fine marble” to a fireplace that has something to say — loud and clear. The Primavera pattern tiles across the entire surround and hearth in the most satisfying, joyful repeat. Cobalt blue, soft sky blue, and those punchy little pops of cadmium yellow make me happy every single time I walk into the room. That’s the whole point.

The best part: no ripping out tile. No mess. No contractor. Very low cost. Just paint, patience, and finally giving your fireplace a personality.
See the Full Feature in Print!
This makeover was featured in the latest issue of Cottages & Bungalows Magazine — and the print feature includes even more detail, tips, and gorgeous photography of the finished room. If you want the full story, grab your copy of the latest issue of Cottages & Bungalows at your local bookstore or online here. It’s a good one, friends! (You can see more of my bedroom makeover here.)
Quick Tips Recap for Stenciling Fireplace Tile
- Always prime with Stix on slick or glazed tile — it’s the key to paint adhesion
- Use a small foam brush, not a roller, for detailed stencil cutouts
- Dab off excess paint on a paper towel before touching the tile
- Skip alternating tiles to avoid painting over wet surfaces
- One application of tacky spray lasts the whole project
- Buy two stencils — you’ll need one to cut for edges
- Finish with the grout line stencil for a realistic tile look
- Always seal with a clear topcoat

Check out my online courses to spark your creativity and upgrade your joy, starting today!


10 Best Statement-Making Fabrics from Spoonflower