DIY Fabric Decoupage Chair Makeover | How to Upcycle an Old Chair with Cottage Charm
Who doesn’t have an old chair tucked in the garage, collecting dust on the porch, or headed for bulk trash day? Before you haul it away, why not transform it into a DIY fabric decoupage chair filled with color, charm, and personality?
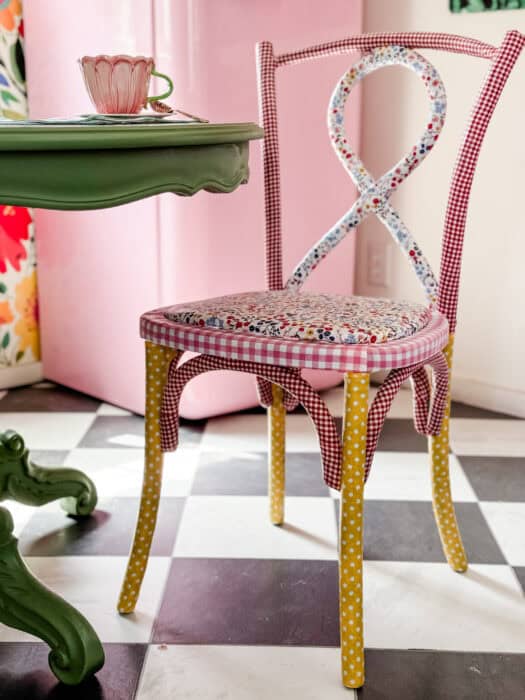
I created this DIY fabric decoupage chair makeover as my entry for the 2026 Cottages & Bungalows Brand Ambassador contest. The project you see here is the one being judged—and now, I need your vote to help me win…Tap here to vote! (Voting ends October 8).
✨ Fun fact: Decoupage isn’t just a groovy 1970s craft—it actually began in 17th-century Venice as a budget-friendly way to mimic Chinese lacquerware. It became so stylish that even Marie Antoinette used it to decorate her furnishings!
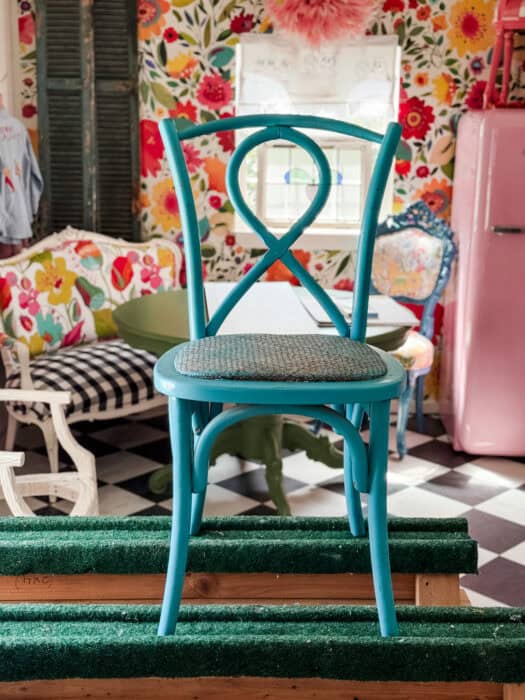
Here’s my before chair…it was headed for the bulk trash pickup until I had this project.
Having tried paper decoupage over the years, I found that switching to fabric decoupage is a revelation: easier, more forgiving, and it gives the sweetest finish. And if you love cottage style, this is your kind of project—mixing florals, gingham, dots, and color in the most joyful way.
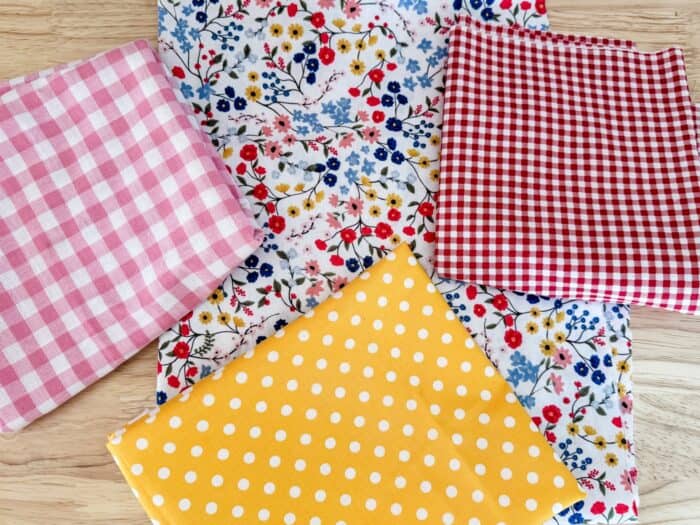
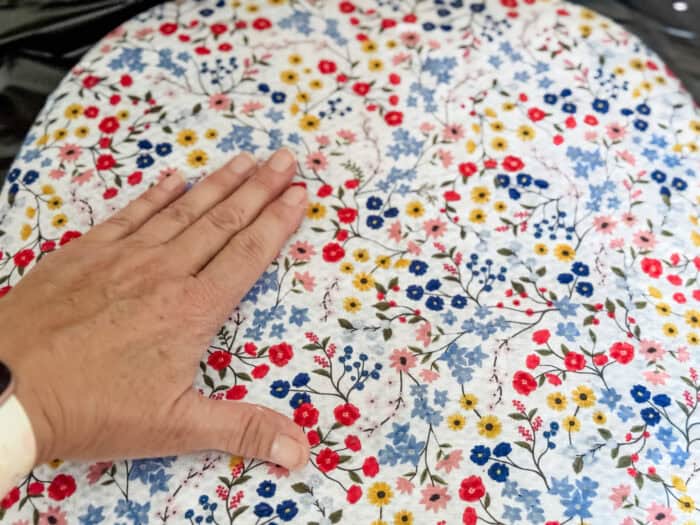
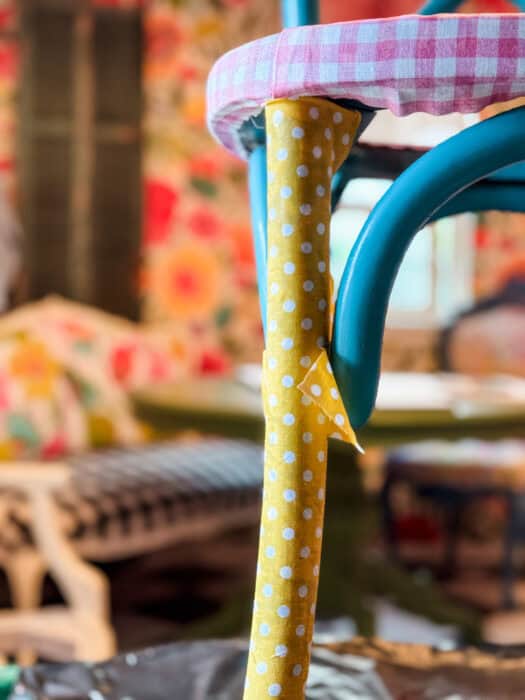
For my chair, I selected a coordinating mix: a ditsy floral (my hero fabric), a small gingham, a dot, and a check. The floral pulls all the hues together, and the small prints do the hard work of blending and hiding seams.
Supplies You’ll Need for a Fabric-Decoupaged Chair
-
A wooden chair
-
Paintbrush
-
Mod Podge (or DIY glue mix: 2 parts white glue + 1 part water)
-
Thin cotton fabrics (quilter’s cottons are ideal)
-
Scissors
-
400-grit sandpaper
💡 Fabric tip: Choose small-scale prints—tiny gingham, ditsy florals, or petite polka dots. These prints hide overlaps and seams, making even tricky areas look seamless. Your floral becomes the hero; the rest support it.
Step-by-Step Guide: How to Decoupage a Chair with Fabric
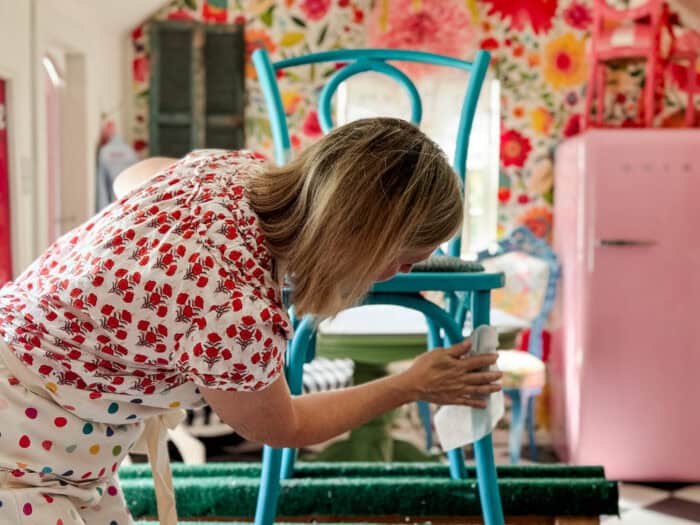
Step 1: Clean & Prep
Start by wiping down your chair to remove dust, grime, or residue. A smooth, clean surface ensures the glue will adhere properly.
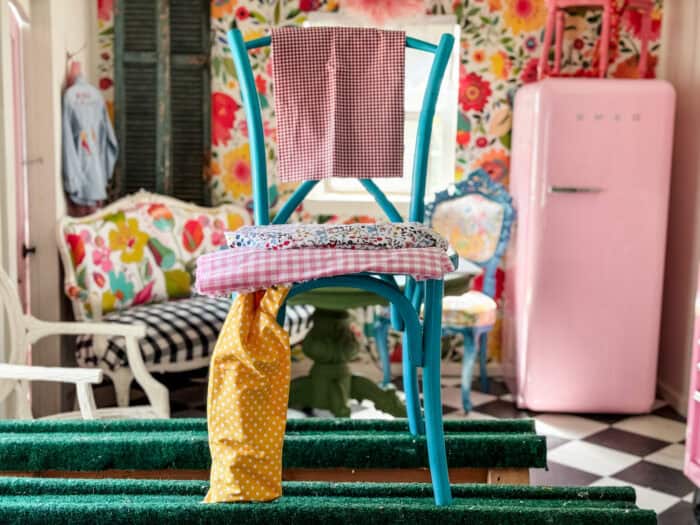
Step 2: Snip & Style
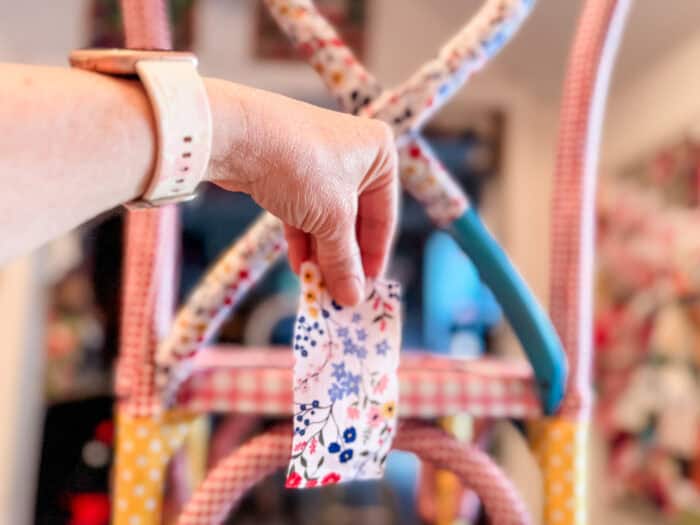
Cut your fabrics into strips or small sections. Workable pieces are key—small shapes yield better control, especially around legs, spindles, or curves.
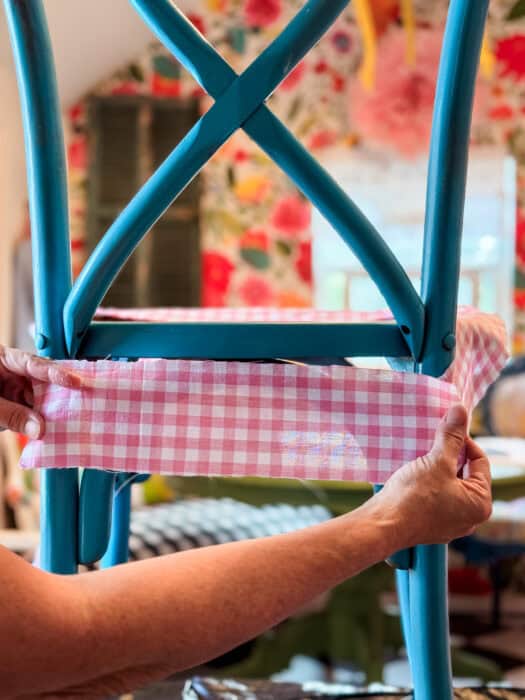
Step 3: Brush It On
Use a paintbrush to apply a thin layer of glue to a section of the chair. Also brush a light coat on the back of your fabric piece.
Step 4: Smooth & Press
Lay the fabric onto the glued area and press it down, smoothing wrinkles and bubbles with your fingers. (Yes, your hands might get sticky—just wash afterward.)
Step 5: Trim as You Go
If the fabric overlaps edges or has excess, trim it even while it’s still wet. Overlaps are fine—just keep them tidy.
Step 6: Piece by Piece
Cover one section at a time. Take your time for a polished result, especially around details.
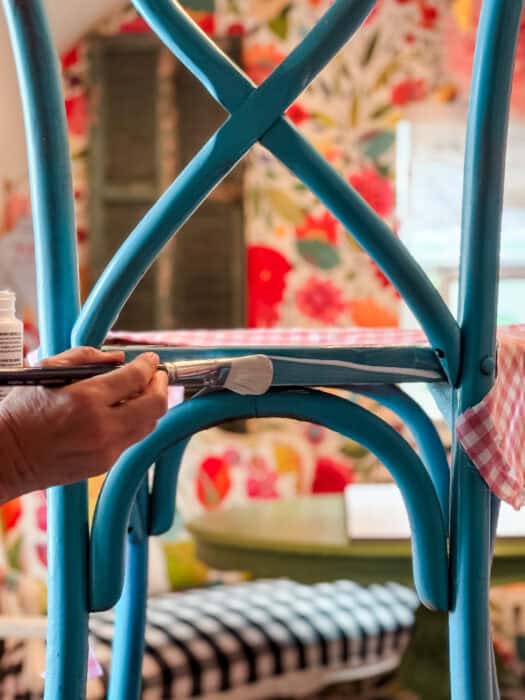
Step 7: Seal the Deal
Once the chair is fully covered, brush 3–5 coats of Mod Podge over everything. Let each coat dry before applying the next to build a durable, wipeable surface.
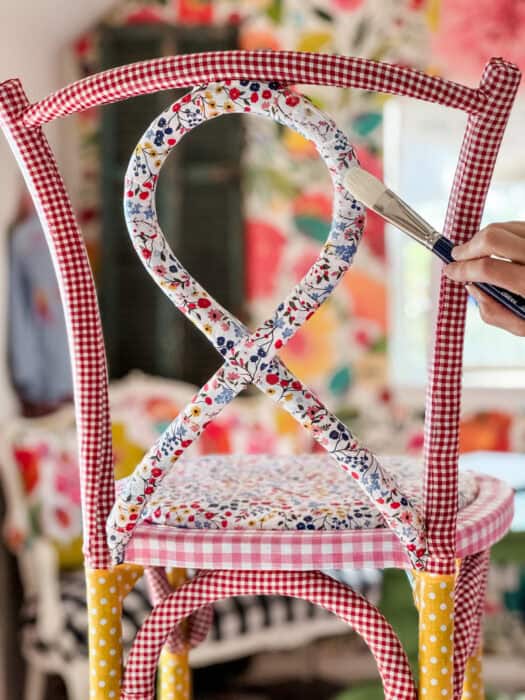
Step 8: Smooth Finish
After the final coat dries thoroughly, lightly buff with 400-grit sandpaper. This removes any tackiness and leaves a soft, smooth finish.

Why Small Prints Shine in Decoupage
When you decoupage furniture, scale is your friend. Large prints often become fragmented and emphasize seams when cut. But small, busy patterns—tiny gingham, petite polka dots, ditsy florals—blend beautifully. Overlaps and seams become nearly invisible, giving your piece that polished cottage look.
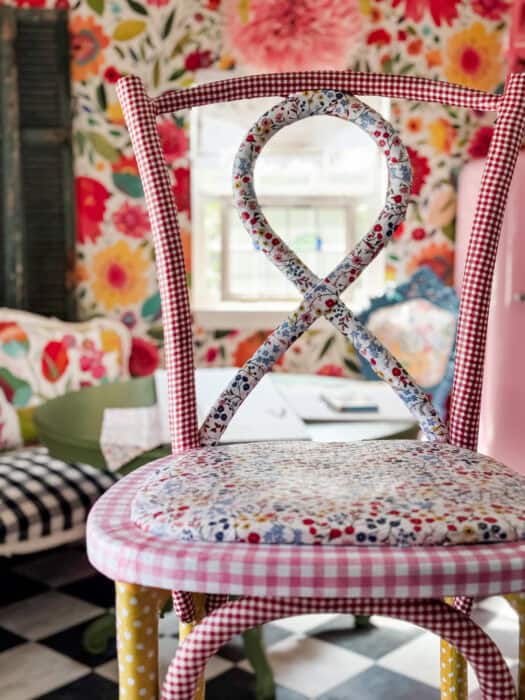
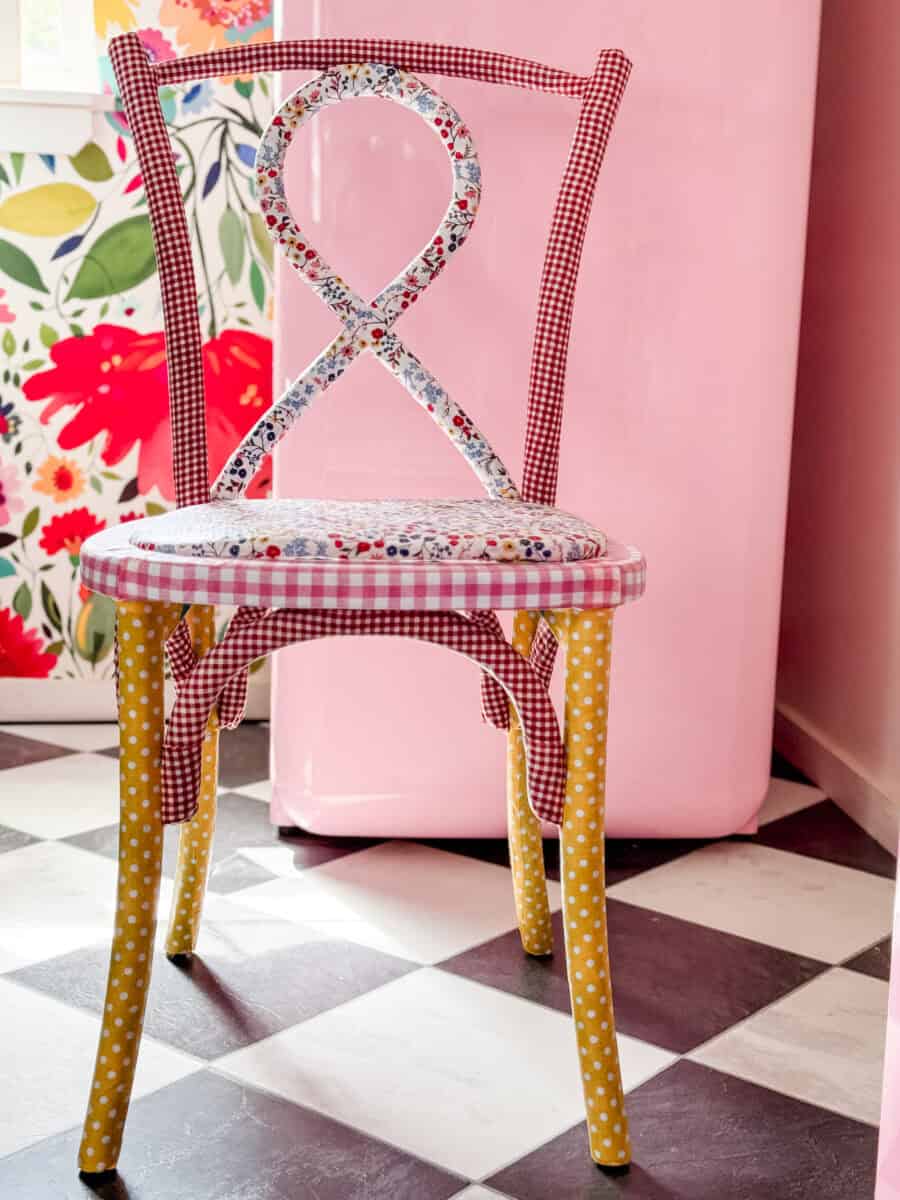
The Big Reveal: From Forgotten to Fabulous
And just like that, your old chair has transformed into a colorful, cottage-inspired statement piece. Picture it in a breakfast nook, beside a writing desk, or greeting guests in your entryway. This is a project that proves how creativity can turn the ordinary into something magical.
Imperfections? They only add to the charm. Cottage style celebrates heart, personality, and handmade touches.
Closing Thoughts for the DIY Fabric Decoupage Chair Makeover
You don’t need perfect furniture to have something beautiful. This DIY fabric decoupage chair makeover shows that a few supplies and a bold idea can do wonders. So if you ever spot a tired chair at a yard sale or thrift shop—grab it. Let your imagination breathe new life into it.
And hey—if you’ve enjoyed following my creative journey, I’d be honored to have your vote in the Brand Ambassador contest. This is the very makeover being judged. Voting ends October 8, so if you have two seconds, click and cast a vote for me here. Thank you from the bottom of my heart.

Check out my online courses to spark your creativity and upgrade your joy, starting today!


10 Best Statement-Making Fabrics from Spoonflower